Software Review
Blender 2.62 Cycles Rendering
(It's buggy, but it's good)
 |
| Click-on images for a larger view |
Machine Spec:
Pentium 4 Core2Duo 2.93 Ghz
3 GB RAM
ASUS P5N-D Motherboard
nVidia Geforce 550GTX Ti 1GB DDR5 192 CUDA Processors.
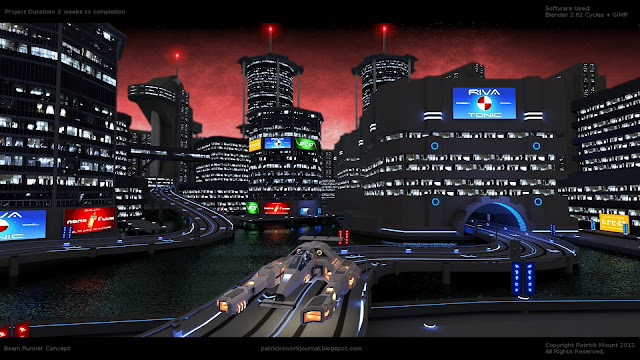
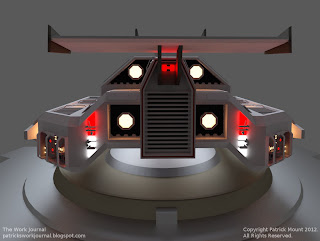
I felt the urge to build a space ship and, at the same time, experiment with Blender's new rendering engine, which is called 'Cycles' for some reason.
After two weeks, I am reasonably satisfied with the end-result; a large scale, futuristic environment, rendered more in the spirit of a concept design than a final show reel scene. Here's what I uncovered.
Let me start-off by emphasising four simple facts about Cycles:
- It is a work in progress - possessing several known bugs that will undoubtedly be fixed in the near future.
- It is more powerful than the old internal rendering system, enabling full global illumination, soft shadows via bounced light etc.
- It is significantly easier to work with than its predecessor, especially with regard to the creation of materials.
- You will probably need access to a Cray Supercomputer if you want to animate with it. I calculated that on my machine, with 2000 samples per frame, it would take approximately 240 hours to render a 60 second animation. That's 10 days of continuous GPU run-time.
The design for the ship came together pretty quickly. I wanted to create a hybrid amalgamation of an X-Wing fighter and a ship from Sony's Wipeout game; something that could race around a track and venture into the vacuum of space. I also threw some Formula 1 into the mix.
As you may be aware from my previous posts, I like Node-Editors; they make sense to me; they express a rational work-flow in a schematic way, and it is relatively simple to follow the ebb and flow of data as it passes through each node in the network. Cycles is fundamentally based on Blender's node editor, but it also gives you the flexibility of working with the familiar side-panel tool bar, should you wish. I found that the best approach was to create a basic material with the tool bar then switch to the node editor to add greater depth and complexity to the material.

The rendering system works by processing the scene in a number of passes ( or cycles - Ah! That's why it's called Cycles).
Each pass adds more detail, or pixel-resolution to be more precise. For a very simple scene, you will only need around 500 passes. For a complex scene, you will need at least 2000 passes.
I wanted the project to be more about the concept than a finished piece, so I decided to keep the UV unwrapping to a minimum and create a simple decal shader.
For this to work, you need two image files; the color map for the decal and the grey-scale alpha mask - in which white represents full transparency, black is fully opaque and the grey scale represents varying degrees of semi-transparency. Here is the node setup:
For the main environment, I needed a water shader. Obviously, I wouldn't be animating it, so I used a seamlessly tileable Perlin Noise texture and plugged it straight into the Displacement Input. I made the water color green with lots of grey mixed into it and then applied it to the Glossy shader node. See below:
Okay! If you're still reading this then you probably want to know about the problems I encountered. Here goes:
My computer crashed frequently, particularly when I switched to the F12 Full Render Mode from inside a Camera Viewport. I think this is already flagged-up in a bug report.
There was a constant error message in the console window which read:
"ShaderGraph connect: can only connect closure to closure". I have no idea what this means.
The worst problem was rogue pixels. This took the form of sporadic white pixelation on dark surfaces, or black pixelation on light surfaces. It seemed to get worse as the scene increased in size and complexity. I had to manually remove each of them using GIMP.
I think what Cycles really needs is a Render Baking option that would allow for the creation of GI light maps (Gile[s] already does this).
This would be useful, not just for video game developers like myself - who need their scenes to run at 60fps, but for anyone who just wants to produce an animation. Baked Global Illumination, applied as a texture, radically speeds up the render time. The artist could use Cycles to light-up the environment, then switch to the conventional renderer to create the animation.
I've uploaded all of the project files to BlendSwap.com
You can download them here:
http://www.blendswap.com/blends/sci-fi/beam-runner-ship/
http://www.blendswap.com/blends/architecture/beam-runner-city-with-track/
I hope this was useful to someone out there.
Bye for now.
 I've designed the 'Training' level to
be a sand-box-test environment, where ideas can be quickly
implemented; some of which I will keep; others I will discard.


